1) Install AVR studio 6 ( http://www.atmel.com/microsite/atmel_studio6/ ).
2) For programming, I am using AVRISPmkII ( http://store.atmel.com/PartDetail.aspx?q=p:10500054 ). Make sure to power your board from external power supply (USB port etc.). Connect AVRISPmkII to your computer, go to device manager and verify that it is being recognized by windows. AVR studio uses "jango" driver which is not compatible with Arduino IDE.
Steps
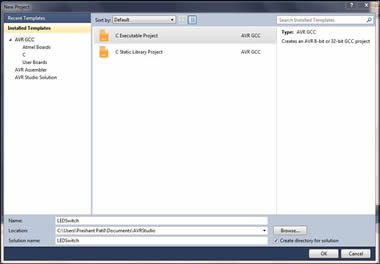
1) Go To File -> New -> C Executable Project (Write name of your project, browse for location). Click OK.

2) In the Device Selection window select your microcontroller. (In my case it is Attiny44A)
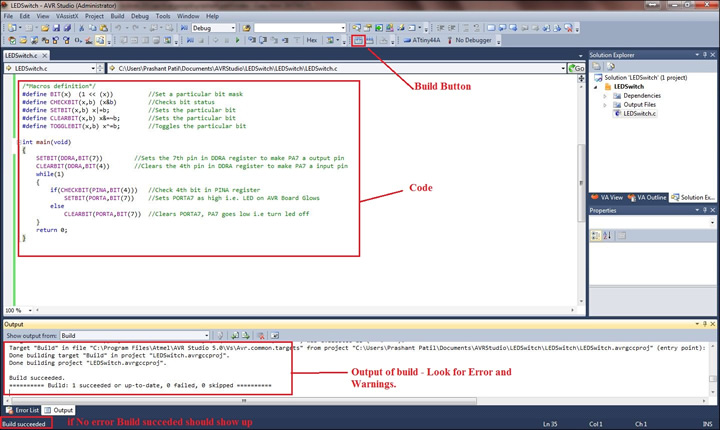
3) AVR studio will open up a .c file with some initial code. You can write you code in this file. Once finished writing the code, Go to Build - > Build or simple click the Build button shown below.

4) The program will compile your code and if no error you should se Build:1 succeded at the Output window as shown above. A .hex file will be created in the project directory which we have to upload to the micro-controller.
Different combination of above building blocks can be used to build the unit cells of all the crystal structures. Here, I have shown few examples -
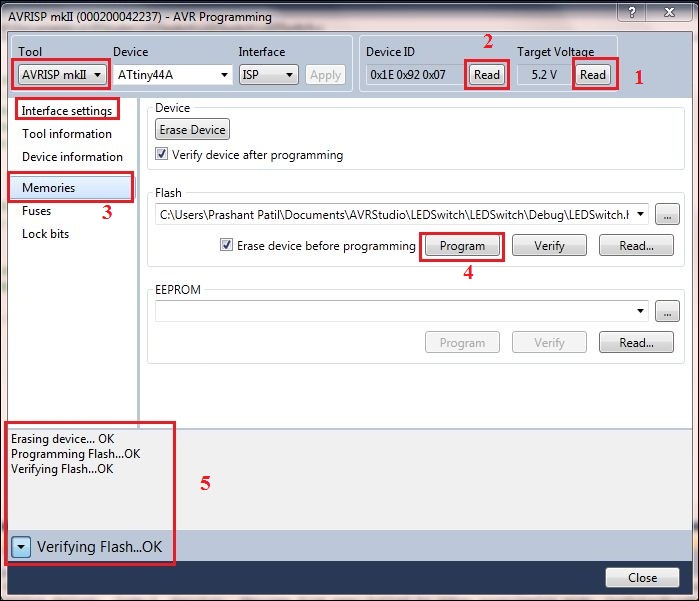
Step 5: Programing the board - Connect the ISP pin of AVRISPmkII to your board (make sure you connect in right polarity). Go to Tools -> AVR programming. In the "Tool" drop-down list select your programmer (I used AVRISP mkII), In Device select your uC ( I used ATtiny44A). Click on "Read" button below Target Voltage, the reading should be the voltage you are supplying to your board (Use external power supply to power your board, AVRISP mkII do not power the board unlike FabISP). Similarly click on "Read" button below Device ID and your device ID should appear provided all the connections are correct.
Debugging - If something goes wrong, check your connections and try varrying ISP clock speed in the "Interface Settings" Tab.
Step 5: For programing go to "Memories" Tab, browse to the projectfolder/Debug and locate the filename.hex file, then click on "Program" button. If programmed The message at the botton should read like " Programming Flash OK" as shown below.

Step 6: Immidiately after the programing finished, the board will start executing the code and we can use the board.
No comments:
Post a Comment